
Linking Stockist to a Google Sheet
Stockist makes it easy to add store details for hundreds or thousands of locations at once by uploading a spreadsheet through our app dashboard.
Note: This feature is available on our Premium plan and higher.
Benefits
Add multiple editors
Connect your CRM or other tool
Connect multiple sheets/tabs
Stockist supports connecting multiple spreadsheets (or multiple tabs within a spreadsheet) to a single map. This can help keep things organized, and also allows configuring the settings and edit permissions for each portion of your store list separately.
Sync at any time
Stockist will check your sheet once a day for any changes and will update your map automatically if any changes are found. You can also run an additional one-off sync at any time by clicking "Sync Now" in the Stockist dashboard.
Advanced integrations
- Google Apps Script, which allows you to run JavaScript code that lives alongside your spreadsheet. This code can be triggered on a regular schedule to "pull" in data from other web-accessible places (e.g. a JSON or XML API, or a web-accessible CSV file).
- Google Sheets Developer API, which allows you to build a standalone script in the language of your choice that runs on your own PC or server and "pushes" data into Google Sheets.
- Third party tools like Zapier, IFTTT, or other software that connects directly to Google Sheets.
Setting up your Google Sheet
To create a Google Sheet that can be synced to Stockist, follow these steps:
- Create a new Google Sheet in the import format supported by Stockist.
-
If you upload a CSV or XLS(X) file, Google Sheets shows a green "XLSX" or "CSV" box next to the name. Make sure to select File > Save as Google Sheets, then follow the rest of the steps with the Google Sheet. Google doesn't support directly syncing a CSV or XLS(X) file.

-
-
Set your sheet’s sharing settings to Anyone with the link can view. First, click the Share button:

Then, under General access choose Anyone with the link / Viewer:

- Follow the steps below under Linking your Google Sheet to Stockist


Templates
- Template for multi-column addresses (if you have separate fields for street address, city, country, etc.)
- Template for single-column addresses (if you have full addresses in one field)
Using a template isn't required — you can also create a sheet with your own heading names, or start from an export of your current Stockist listings generated from Locations > Bulk export in the dashboard.
To copy a template to your own Google account:
- Click on a template above
-
If needed, sign into your Google account:

-
Choose File > Make a copy:

-
Choose a name for the copy and the destination in your Google Drive, then click OK:

- You can now edit the copy of the file


Linking your Google Sheet to Stockist
Once you've set up a Google Sheet, you can connect it to Stockist to sync the data to your map:
-
In Stockist, open Locations > Bulk import. In the Google Sheets sync section, click Connect a Google Sheet. If you don't see this button, ensure your account is on the Premium plan or above.
-
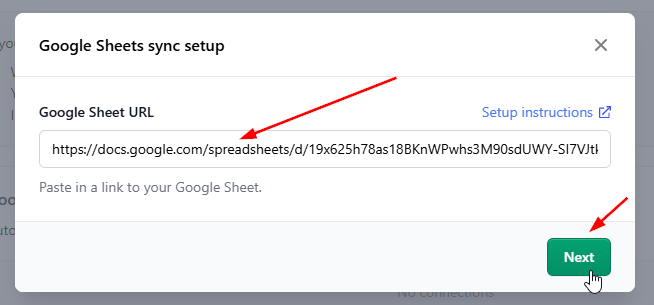
Paste in the link to your Google Sheet, then click Next:
-
Choose which tab of your Google Sheet contains data to sync, then click Next:
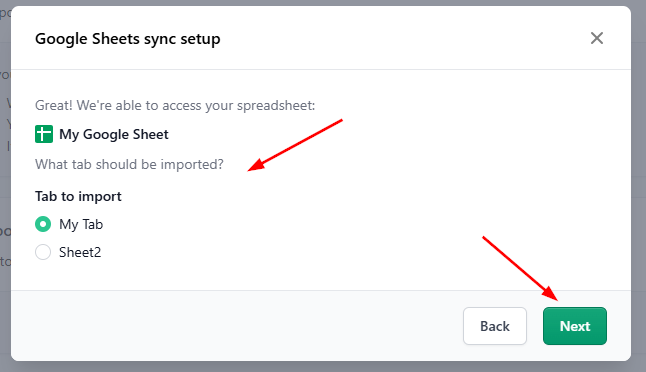
If you need to sync multiple tabs, repeat the setup process for each tab to set up a separate connection for each tab.
-
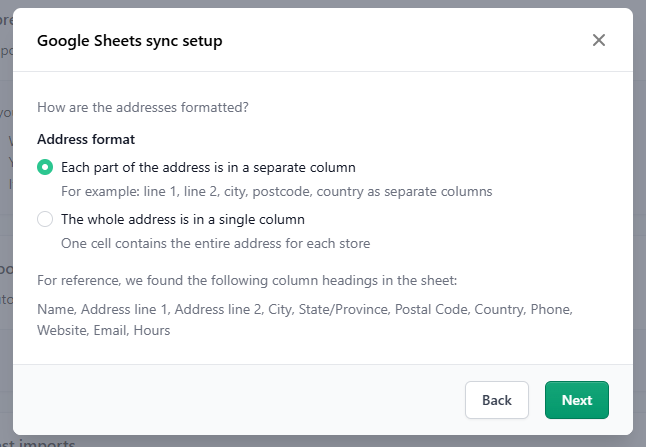
Choose whether the address information is all in a single column or spread across multiple columns:
-
Match each column in your file to the appropriate field on your map. Stockist will try to automatically match each column based on the heading names, but please double-check that the matches are correct:
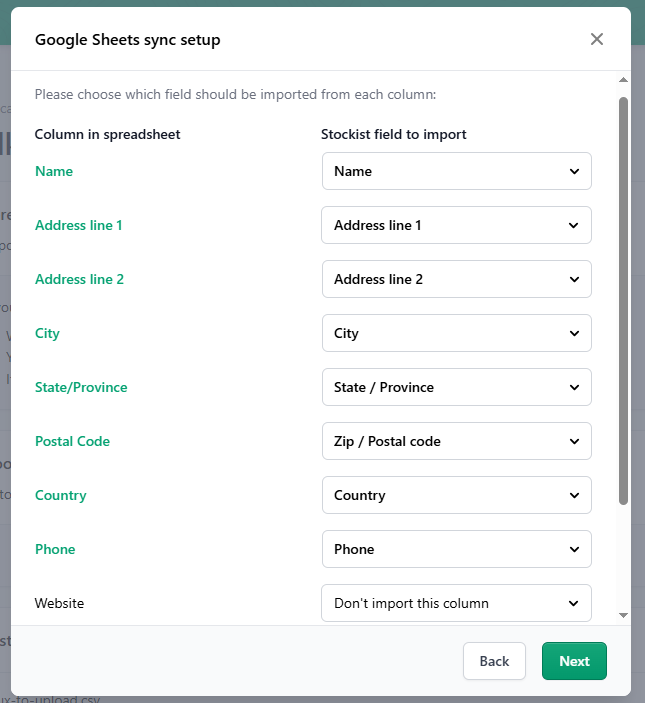
You can select Don't import this column for any columns that shouldn't be synced to your map. This can be used for internal-only columns that shouldn't be public, or to temporarily remove a specific field from your map.
Once everything is matched correctly, click Next.
-
Lastly, choose the schedule that Stockist uses to check the Google Sheet for changes. You can pick specific days and choose the approximate time of day that the check occurs:
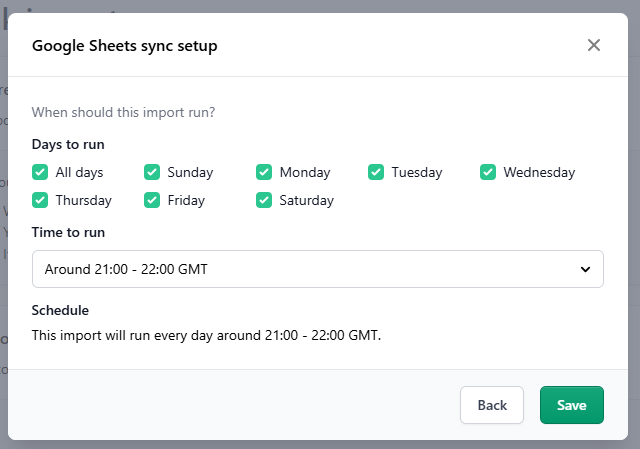
You can also run an extra sync at any time using the Sync now button in the dashboard.
- Click Save to create the connection






Running your first sync
Once you've connected your Google Sheet, it'll appear in the list of connected sheets, but the first sync won't happen automatically until the next scheduled check.
To run an immediate sync, you can click Sync now in the list:
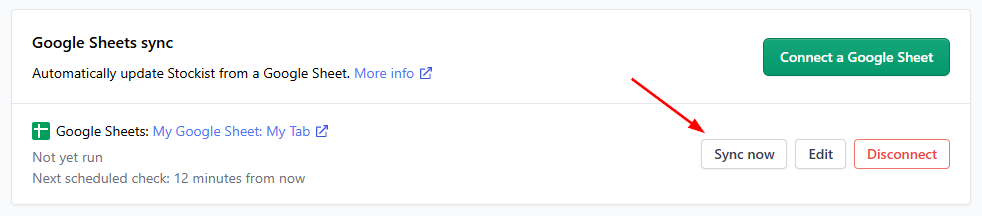
Note that the listings in the Google Sheet will be added alongside any existing listings in your account. If you already have listings in your account that you've copied into the Google Sheet, they'll end up duplicated. To avoid this:
- If the Google Sheet contains your entire list of stores, delete all entries from Stockist before running the first sync. On the All locations page, click Show 1000 at the bottom, then use the top checkbox to select all stores on the page and choose Bulk actions > Delete. Repeat for any additional pages. Then, click Sync now next to the Google Sheet connection to re-add the listings under control of the sync.
- If your Google Sheet contains only a partial list of stores, delete any duplicated listings from your account before syncing. If you previously imported the stores as a CSV file, you can open Locations > Bulk import > [filename] and click Delete this import to remove the original copy of the listings.
Keep in mind
- Stockist remembers the heading name in each column and uses it to find the same data later on. Renaming or removing any connected columns will require editing the connection in Stockist so that the sync looks for the new set of columns.
- It's fine to add extra internal columns later on; extra columns that aren't connected don't affect the sync
- The sync is only one-way - details from the Google Sheet are copied into Stockist, but not vice-versa. To set up your Google Sheet initially with your existing listings, you can export your current store list from the Stockist dashboard to a CSV file under Locations > Bulk export, then copy/paste the details into a Google Sheet.
- Currently, your account will be updated from the Google Sheet once a day. We're hoping to offer more frequent options in the future.