Changing the map pin icons in Stockist
Stockist supports customizing the pin icons used to show the stores on your map. You can change the color of the standard pin icon or use your own custom icon image, allowing you to create a unique and branded look for your store locator.
You can also set up multiple different pin icon styles for your map and then apply these styles to different categories of stores. This can help organize your map and make it easier for customers to find what they’re looking for.
Pin icons in Stockist
In Stockist, map pin icons are used to visually represent each store on your map. By default, Stockist uses a standard pin icon, but you can customize this icon to match your brand or differentiate between various store categories. There are two main types of pin icons you can manage:
- Default pin icon: This icon is used for all stores on your map, unless otherwise specified.
- Additional pin icons: These are extra icons you can create to represent different categories of stores, such as flagship locations, outlets, or authorized dealers.
Changing the default pin icon
Changes made here will normally apply to all pin icons on the map. If you're using a single icon for all of your stores, this is the place to make changes.
To edit the default pin icon, follow these steps:
- In Stockist, open Settings > Appearance > Map pin icons
-
Click Edit next to the "Default pin" entry
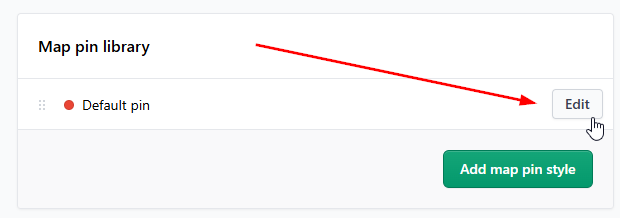
- Make changes to the pin settings, then click Save to update your map

You can also change the name of the icon from "Default pin" to something you prefer. This usually isn't needed if you only have a single icon, but it can help keep things organized if you plan to add multiple icons to your map.
Icon options
For both the default pin icon and any additional pin icons, you can choose whether to use the standard pin icon (in a color you choose) or to use a custom icon image you create.
- Under Name, choose a name for the icon - this is just for your reference and not visible publicly
- Under Pin type: Select Standard pin icon to use the built-in pin icon, or select Custom image to replace the icon with your own image file
For the Standard pin icon, you can choose the icon color:

When selecting Custom image, specify the URL for your pin image and whether to resize it to display crisply on high-density devices (e.g. Apple Retina):

You can find more information about creating and hosting your custom icon file here.
Setting up multiple pin icons
If you want to represent different types of stores with unique icons, you can create additional pin icons. This is especially useful if you have multiple store categories that you want to visually differentiate on the map.
To create an additional pin icon, follow these steps:
- In Stockist, open Settings > Appearance > Map pin icons
- Click Add map pin style
- Choose a name for the new style and set the desired color or custom image
- Click Save to add the new pin style

Once you've created your pin icon styles, follow the steps in the next section to assign them to categories.
Assigning pins to categories
Once you’ve created additional pin icons, you can assign them to specific categories on your map. To do this, create a search filter for each category and link the custom pin style to the filter.
We have more details here about setting up filters in Stockist.
When creating or editing a search filter, you can click Link a map pin style and choose the icon to use for that particular filter/category. Once you've linked a pin style to a filter, that pin style will automatically apply to any stores that have the filter.


Search filters are normally visible to customers on your map—they appear as search options underneath the search bar and are also shown in each applicable store listing. If you want to set up custom icons but not make the filters visible to customers, you can hide a filter from your map by turning off the Visibility settings for the filter.
Prioritizing pin icons
If each store only belongs to a single category, the order of the pin icons in the dashboard doesn’t matter.
However, if a store can potentially belong to multiple categories that are each linked to different icons, you may want to choose which icon will apply in this case. You can prioritize the icons by dragging them up and down in the list under Settings > Appearance:

Icons that appear towards the top of the list have higher priority and will be preferred over icons that are further down the list. You can think of Stockist looking down the list (starting at the top) and using the first icon in the list that applies to the store. If none of the additional icons apply to a store, the default pin will be used for that store.
Examples of multiple icons
Here are a few examples of how you could set up multiple icons:
Your own locations vs. partner retailers
You could create an additional icon to use for your own retail locations, and then use the default pin icon for any other locations (e.g. those of partner retailers):

Dealer tiers
You could create additional icons for each tier of store, and use the default icon for standard (non-tiered) retailers:

Per-retailer pins
You could create an additional icon for specific chain retailers, and then use the default icon for any other stores (e.g. independent stores):

Questions
If you have any questions about customizing the pin icons for your map, please let us know and we're happy to help! You can use the Contact us page in the dashboard, or the link at the top of this page.