Creating a custom map style for Mapbox
If your Stockist account is using Mapbox as your map provider and you’d like to customize the styling of your map beyond the built-in options, it’s possible to create a completely custom style in your Mapbox account.
Important: Please be sure to create your style by starting from one of the options below. Clicking "New Style" directly in the Mapbox console will create a style that is incompatible with Stockist.
Note: Custom map styles are currently supported on the Plus plan and above.
Templates
You can base your custom style off of any of the templates below:
|
|
Monochrome Choose a single theme color to control the overall look of the map. This is the quickest starting point to create a map that uses your brand color. |
|
|
Streets Mapbox's basic streetmap style. If you don't need to customize this style, you can select it directly in Stockist. |
|
|
Outdoors An outdoors-focused style with more prominent topography and hiking trails. If you don't need to customize this style, you can select it directly in Stockist. |
|
|
Light A light basemap theme that helps store pins stand out. If you don't need to customize this style, you can select it directly in Stockist. |
|
|
Dark A dark basemap theme that helps store pins stand out. If you don't need to customize this style, you can select it directly in Stockist. |


Creating a custom style
To create custom style in your Mapbox account, follow the steps below:
- Choose one of the templates above as a starting point
- Click Start from this style under your chosen template
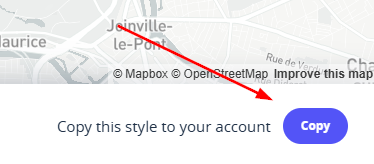
-
Click Copy in the bottom-right corner to copy the style into your Mapbox account where it can be edited
-
In the editor that opens, click on a layer in the Layers tab to change the individual components of the map. For example, to edit the primary map color in the Monochrome template, you can click on Land & water, click on the Base color, and then edit the color in the selector there:

You can customize the colors, text, and language for each individual component.
-
Once your map looks how you’d like, click the Publish button in the top right corner:

-
Confirm that you want to publish your changes:

-
You should see a confirmation popup, which you can dismiss:

-
Click the Share button in the top right corner:

-
Copy the Style URL using the clipboard icon:

-
In the Stockist dashboard, open Settings > Appearance. Under Map theme, choose Custom, then paste the complete Style URL into the Custom Mapbox style field:

- Save the page to update your map


Once the custom style has been linked to your Stockist account, you can make further changes directly in Mapbox studio and your store locator map will update with the new style automatically.
To edit your style in the future:
- Open your Mapbox account and sign in if prompted
-
Click Style editor or open https://console.mapbox.com/studio/

- Click on the style to open the style editor
- Future edits appear on your Stockist map automatically one you click Publish — the Style URL doesn't change and you don't need to paste it in Stockist again.
