Using Stockist Store Locator with PageFly
Stockist works with the PageFly app on Shopify, and it’s possible to add your store locator map as an element on a page built with PageFly.
Installing Stockist on a PageFly page
- In PageFly, open or create the page where you'd like to add your map
-
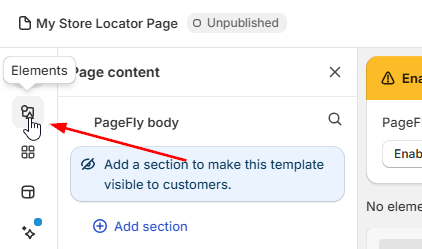
In the left panel, click the Elements section:
-
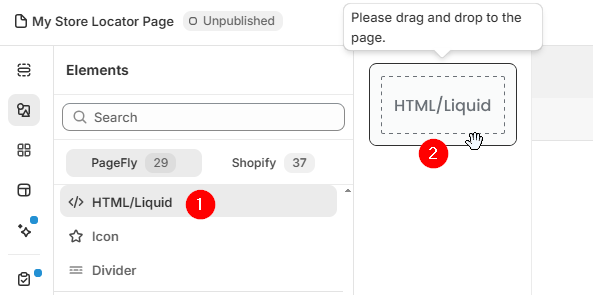
Click the HTML/Liquid category, and drag in an HTML/Liquid element to the page at the point where you'd like to show the map:
-
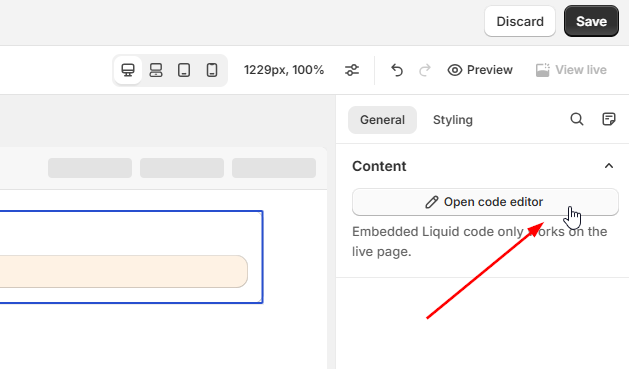
With the HTML/Liquid element selected, click Open code editor in the element's settings:
-
Open the Embed code page of the Stockist dashboard. If you set up our Shopify app, click the Show manual installation steps link:

-
Click in the grey code box to select the embed code:
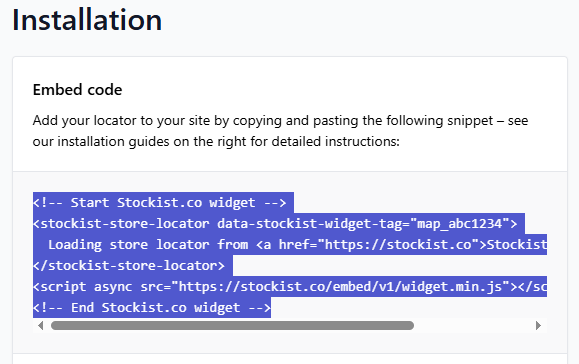
- Right-click on the code and select Copy from your browser's right-click menu, or press Ctrl+C (or Cmd+C on Mac)
-
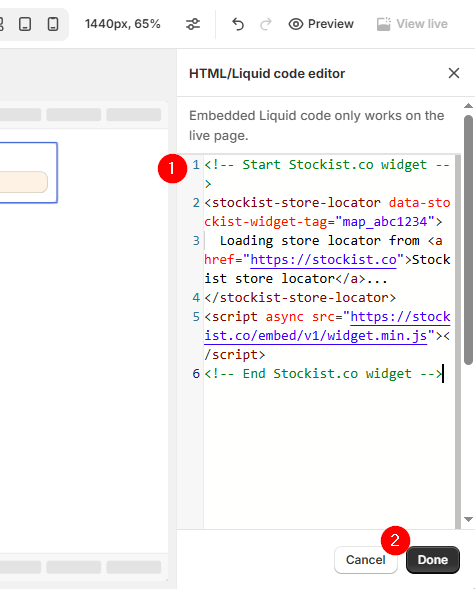
Back in PageFly, paste the code from step 6 into the code editor that was opened, then click Done:
- Save the page, then preview it on your site to confirm how the map looks. Note that the map won't be able to load in the PageFly preview, but should be visible when the page is viewed directly on your site.


Installing Stockist (Legacy PageFly Editor)
- In PageFly, open or create the page where you’d like to add your map
-
Click the Add element button in the left panel, then under Basic click HTML/Liquid and find the HTML5/Liquid element:

-
Click and drag the HTML5/Liquid element into the page at the point where you’d like the map to appear:

-
Click on the new element you added, then click Open Code Editor in the side panel:

-
Open the Embed code page of the Stockist dashboard. If you set up our Shopify app, click the Show manual installation steps link:
-
Click in the grey code box to select the embed code:

- Right-click on the code and select Copy from your browser's right-click menu, or press Ctrl+C (or Cmd+C on Mac)
-
Back in PageFly, paste the code from step 5 into the code editor that was opened, then click Save & Close:

-
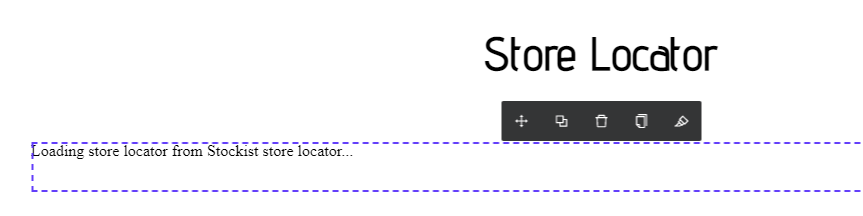
The "Loading store locator..." message should appear in the HTML element you added, but the map itself won’t load within PageFly's editor view (it only loads on your live site):
-
Click Save to update the page:

-
To check that your map was set up properly, use the Preview option to view the page as it will appear on your site. The app should load as expected in the preview:

-
If things look good, click Publish to make the page live on your site:


