Installing Stockist Store Locator on Lightspeed (C-Series)
Stockist works with websites powered by Lightspeed eCommerce, and lets you easily add a full-featured store locator map to your Lightspeed eCommerce website.
After signing up with Stockist, you can use the steps below to add your map to a page on your Lightspeed site:
-
In the left menu of your Lightspeed admin, click Content:

-
Click Add Page in the top right:

-
Click the Source code button in the page content editor (it looks like <>):

-
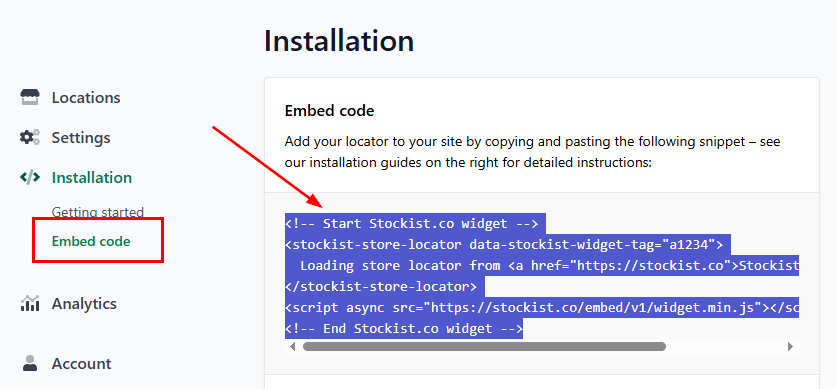
In your Stockist dashboard, open the Installation > Embed code page and copy the code snippet that's shown:
-
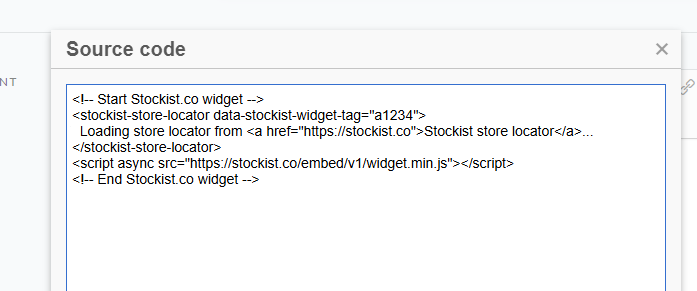
Back in Lightspeed, paste in the code from Stockist in the Source code popup that opened when clicking the Source code button:
-
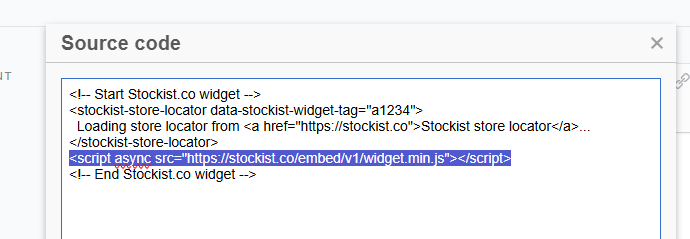
Highlight everything between <script> and </script> (inclusive):
-
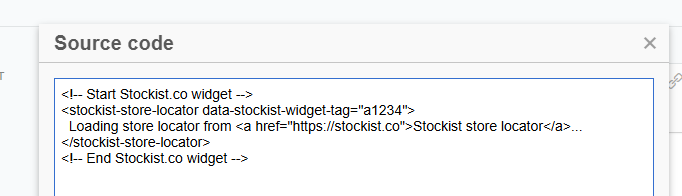
Delete the part you highlighted from the code, so that line is removed:
-
Click Ok to save the modified code

-
Click Save to save the page:

-
Back in the main Lightspeed dashboard, click Settings:

-
Under Website Settings, click Web Extras:

-
Under Custom JS, ensure the Status setting is On, then paste in the following code:
<script>
(function(s,t,o,c,k){c=s.createElement(t);c.src=o;c.async=1;
k=s.getElementsByTagName(t)[0];k.parentNode.insertBefore(c,k);
})(document,'script','//stockist.co/embed/v1/widget.min.js');
</script>

-
Click Save to update the settings:

- Your store locator should now be loading on the page you created.


If you run into any trouble, please feel free to reach out to us for assistance!